Showing posts with label How To. Show all posts

Tuesday, September 9, 2014

How to Create Large Wall Decor On a Budget

Please allow me to introduce you to one of my favorite recent projects...this lovely frame!


I wanted one large piece of art to place above our couch in the living room. To me, small pieces made the wall feel empty, while multiple pieces made it feel cluttered. (I'm sure the full-to-the-brim bookcases on either side of the couch don't help with the cluttered feeling either.) However, we all know large decor tends to cost quite a bit—more than I'm personally willing to spend on a piece for a home I will live maybe a year in. Ikea, for example, has several large options with a $49.99 price tag; that's something I'd pay, but the options were either unappealing to me or overdone.

Let me share how I got this piece to come together. If you follow me on Instagram, you've likely seen the updates on each step.

FRAME

I started by searching for large frames anywhere and everywhere. Garage sales, thrift stores, clearance aisles. Most things simply weren't large enough. Plus, most larger (ish) frames were still selling for $20 bucks at my local Deseret Industries. $20 bucks for an ugly frame with an ugly picture and oftentimes not even real glass. I said no to that.

In one of my many searches, I found a few options. These are the pictures and messages I sent to my husband.

A. Gold frame, would still paint. Thicker plastic although it could be glass. Matted too. Smallest option. $20
B. Yellow metal frame. Would spray paint maybe silver. Plastic cover $10
C. LARGE FRAME. See other sizes in picture. No back, no glass. Slight imperfection on one side. $5. Could paint and blow up a pic. 

Option C would require the most work. Not to mention, I didn't know if I could get a picture that big...or if I could fit the frame into my car. 

Jake's response, "I like the big one. The $5 one" quickly reaffirmed my worries and I went ahead with the $5 frame. 


Before I did anything else, I wanted to make sure it was possible to piece together the backing and image to go in the frame. Otherwise, I'd probably use this for a headboard type of project.

BACKING

I headed to Hobby Lobby's framing section to see what kind of foam boards they had available. Nothing big enough was available on the floor, but we waited for an associate who said they could definitely cut something to the exact dimensions I needed. The cost for the largest board was about $10 but then I used their 40% off coupon to get it for $6. 


PICTURE

This frame was way to big to even think about featuring a picture of Jake and me. Can you imagine that? Right above our couch? Haha. 


I did look at some scenery type of pictures with us, but nothing really worked. In fact, I found that I wasn't even liking photograph options for that size. I used my stock image resources at both sxc.hu (free site) or depositphotos.com (I got a great discount price for something like 100 downloads for $99 and use this site for lots of my client project needs).

In the end,  I was drawn to digital artwork by the user karakotsay. I liked the abstract perspective and considered options like this, or this, or this, or this.  

Jake and I both decided on this option:

PRINTING

From the start I knew I'd be printing this in black and white. Why? While I love the color, you can print in b/w a LOT cheaper than printing anything that large in color. Most office stores will allow you to print engineers prints for super cheap. These are low quality but for $6-8, it's a great option and can be switched up whenever you want. Also, I planned to paint the frame a color to help brighten up our living room and the black/white would help balance that color AND tie in the black from our furniture.

Fedex was the ONLY place I found that could print the size I wanted.  The employee there was amazing. It took maybe 6 or 7 tries to get it to print right, but in the end everything worked out great.

PAINTING

Head to Home Depot or Lowe's to purchase paint for small projects. You can get any color mixed in a sample bottle for about $3. I've done this a handful of times and the paint lasts forever!!  I got this lovely teal blue and got that thing painted. 


FINISHING UP

The final step was just putting everything together. I used a spray adhesive from a previous project to apply to picture to the foam board. Jake helped me, and we probably did six inches all the way across the board at a time. 

We'd spray, lay the picture, smooth it out, spray, lay, smooth, spray, lay, smooth. Fun process. After that, I turned the board over to and folded the excess paper onto the back side. Then we stuck the board in, got that set in...and we were good to go. 

Total cost: $22


Tuesday, October 1, 2013

How to Spend Leftover Gift Card Balances

Does anyone else have a stack of gift cards that they just can't seem to get rid of? Don't get me wrong. I love receiving gift cards, and I appreciate the many people they have come from.

But when that balance gets pretty small, I have a hard time spending those last few dollars. A couple weeks ago I had the goal to—get this—spend all my gift cards! I thought it would be a fun weekend activity, but in the end I didn't find anything I wanted to buy. And when I go grocery shopping and such, I either forget or think it will be too much of a hassle to try to pay with five gift cards. I bet cashiers loooove that.

Next I thought, oh hey, I'll buy stuff online! ... But most online checkouts don't allow you to determine partial payments from those cards. And there I was stuck again.

I'll tell you that I did NOT get those gift cards spent...although I did empty a Walmart one.

However, I finally found the best way for me to spend those gift cards and get them out of my wallet.

AMAZON!

I can always find something to buy on Amazon. So when I discovered that Amazon actually lets you buy an e-gift card for any amount—yes, ANY AMOUNT—and adds that gift card to your Amazon balance. It never expires and will automatically apply to your Amazon purchases if you want it to. So clean out your wallet and add some money to your Amazon account.

How to Spend Your Gift Cards.

1. Call the number or visit the website listed on the back of your gift card. Find out the exact balance of the gift card.

2. Go to Amazon.com and find the option to purchase an e-mail gift card. (Yes I link there.)


3. Next to "Amount," select "Set my own." Then type the amount of the gift card you'd like to empty. 

4. After clicking "Purchase" select "Pay with new card" and use the gift card info in the payment section.

 5. Confirm your purchase and check the e-mail you mailed the gift card to. Click "Redeem now." This will automatically take you back to Amazon and add the gift card amount to your balance.

6. Spend!


Friday, July 19, 2013

Crossfade Your Music in ITunes

You've heard the phrase: "There's an app for that." Yes, yes, there usually is. But sometimes you don't even need a special app; the feature just might already be available in a program you use and are familiar with.

Today I'm sharing the VERY simple steps to add a crossfade to your iTunes playlist. 

"Crossfade" definition: fading one song out while fading another song in. This eliminates any gaps between music. 

In the group fitness world, using a crossfade on your playlists helps keep the energy up and create a seamless class. And a lot of people don't know that they can add a crossfade to any playlist just in iTunes. Keep in mind that this option creates the same crossfade for every transition. You might need to try another program or research apps (I'll try to share more later) that offer more options. But for basic needs, iTunes does the job.

Here's what you do. 

Step 1: Open iTunes

Step 2: Click "iTunes" in your menu bar and select "Preferences"


Step 3: Select "Playback" in the popup box

Step 4: Click the "Crossfade" box


Step 5: Place the cursor where you'd like it on the glider. For a more gradual crossfade, move the cursor towards the 12 second range. 

Step 6: Choose a playlist to test the crossfade. Jump to the end of the song, so you can see how the crossfade sounds. Go back to Step 5 and adjust as necessary. 

That's it! Pretty simple, right? This is great for parties or background music too! In the choreographed group fitness world, you'll want to make sure the crossfade doesn't affect music cues at the beginning and end of songs. 

Did you also know you can change when a song begins and ends? I'll share that next week! 

Monday, July 1, 2013

Replace Google Reader: How to Transfer to Feedly

Today is your last day with Google Reader. Last week I kicked my procrastinating self into gear and focused on exploring the options to replace my Reader addiction.

Check out my posts "So Long, Google Reader," and "5 Steps to Export Your Google Reader Data" for some more info.

I'll walk you through the very easy setup options for the programs BlogLovin (click for post) and Feedly. I'm not sure if you'll be able to directly export your info after July 1, 2013, so I'd suggest setting up accounts TODAY or exporting your data to transfer later. You can always play around with the programs and choose which you'll use later.

Feedly

Here are some steps to import your data. It is very, very easy.

Step 1: Go to Feedly.com. Click button that says "One-click Google Reader Import." If you are already signed into a Google account, the popup will let you select which account your Reader is currently associated with. You will then accept Feedly's request to your info and such.


Step 2: That's pretty much it! That one-click button is pretty accurate. Once your import is complete, you'll see a screen that looks like this.  


Feedly is very straight forward (which I like about it). It has several view options. The above view is under "All." 

Or you click "Today," you see something like this.

You can also click "Index" and see a view like this with the capability to organize your feeds and such. (I desperately need to do that.)


You can also customize the themes and set your preferences. (So you can set your default view to whichever option you prefer.) 

And don't forget the Feedly mobile app. It operates pretty much exactly like the website. 

This is the main view:

In the categories, you can select the view options. (See the tiles above "Refresh")


Anyways, that's pretty much it! I'm very much liking the simplicity of this program. What do you think?

Replace Google Reader: How to Transfer to Bloglovin

Today is your last day with Google Reader. Last week I kicked my procrastinating self into gear and focused on exploring the options to replace my Reader addiction.

Check out my posts "So Long, Google Reader," and "5 Steps to Export Your Google Reader Data" for some more info.

I'll walk you through the very easy setup options for the programs BlogLovin and Feedly (click for post). I'm not sure if you'll be able to directly export your info after July 1, 2013, so I'd suggest setting up accounts TODAY or exporting your data to transfer later.

BlogLovin

For the personal blogging types (specifically a lot of craft, mommy and fitness blogs), Bloglovin seems to have been promoted in those communities as the only option to replace Google Reader. Great marketing, Bloglovin!

Here are some steps to import your data. It is very easy and very self explanatory.

Step 1: Go to Bloglovin.com. Click button that says "Join Bloglovin"


Step 2: Set up your account either through Facebook or an email. (I'm one of those who does not like things all connected to Facebook...I don't know why.) If you select Facebook, it will pop up with an option to grant access. Otherwise you'll enter your info and click a link that is set to your email account.


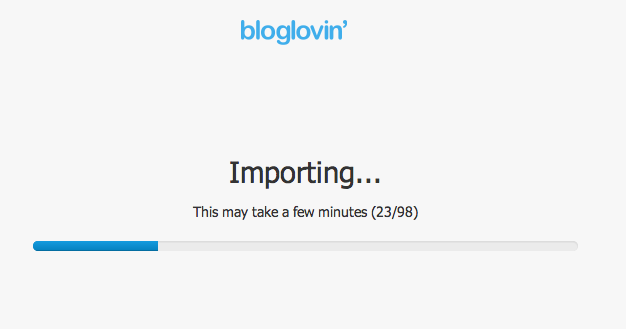
Step 3: Once you verify your account through email or Facebook, you'll have the option to import your blogs from Reader.


Step 4: Walaaa. You are done. Check out the home screen. 


Bloglovin's features do a lot more for blog promotion than a simple RSS feed program. For example, even when you check your feed's, you'll be able to see it in the blog frame, i.e. you'll see the blog design with a Bloglovin bar across the top. 


You'll also be exposed to a lot of different blogs (and as a blogger, you'll be able to promote your blog in different ways). You'll find options to visit popular posts and many featured categories and more. Bloglovin has a lot to offer if you want to explore some more.


Saturday, June 29, 2013

5 Steps to Export Your Google Reader Data

You've heard the news. Google Reader will officially say "So, long" Monday. If you are a procrastinator like I am, you probably haven't taken any action on your Reader account. But now is the time! You don't want to lose your info!

Today's "How To" shows how to export your Google Reader data. This is a great option to have on hand if you don't know what program you want to use quite yet but want to make sure not to lose feeds. (If you DO know what program you'll use, you'll likely have the option to switch the data directly, i.e. go to the program site and see if there's an obvious "Import from Reader" option. I just don't know if that option will be available after July 1.) I'll go over basic steps for some programs tomorrow

OK, here goes:

If you don't know what program you want to use as a replacement for Google Reader:

Step 1: Sign into Reader and click the gear icon in the top right corner. Then click Reader settings.  (Gear icon = gear icon)


Step 2: In settings, click the "Import/Export" tab.
Step 3: Under "Export your information," click on the "Download your data through Takeout" link. (You can also go to https://www.google.com/takeout/#custom:reader directly.) Remember, you will have to enter your Google password again. 


Step 4: Once Takeout shows 100 percent, click the "Create Archive" button.

FYI Step: Takeout also provides these services for any Google product. Just click "Choose services" and select what information you'd like to export. 

Step 5: Takeout will prepare your data for download, and you'll see a screen like the one below. Click "Download" (and know where'll you save your file). You now have this data to upload later if needed.

LinkWithin